Tuesday, June 24, 2008

June 16 and June 21 -New ATCs

I haven't been doing as many online ATC swaps lately ~ too busy attending classes, working, traveling, etc. Maybe I'll take on more after vacation in July. Here are a few that I've done the last week or so. I really like how the "His & Her" cards came out. Mine are definitely all "Hers" - the theme dictated we could do either or both. I don't think I've used any of these rubber stamps before so it was nice to use something collecting dust in my bins.

I think with the Green Swap card I may have gone overboard. She is maybe a wee bit....too much? I don't usually do all this glitter & sequin type stuff - felt right at the time, but I may have been wayyyyyyy out of my element. What do you think????

G is for...green...girl...
G is for...green...girl... (For a "Green" ATC swap)


Following set was for a "His & Hers" ATC swap:
Photobucket

Photobucket

Photobucket

Sunday, June 22, 2008

HANDMADE BOOK

My Sweetie and I are going on a cruise next month. We leave from L.A. and spend a day each at San Diego, Catalina Island, and Ensenada, Mexico. I wanted to make a special book to journal in as well as having a place for photos and envelopes for ephemera I collect along the way. I still need to do some embellishing, but may wait to do that until after the trip - not sure yet. I love this leather clasp from 7 Gypsies - it works great and was sooooooooo easy to install.


Photobucket

The pages are all attached to an accordian style binding:
Photobucket

There is an envy like this for each city:
Photobucket

We leave in 22 days!! My first cruise - can't wait!!!

MONOCHROMATIC CHUNKY BOOK SWAP

I frequently do ATC swaps through the mail with an online group: atcsforall.com. They also have swaps for chunky books pages, round robins, inchies, rolos, and a multitude of other things.

I decided to branch out a little and join this chunky book page swap. I made 8 pages - sent 4 off for the swap and kept 4. It was hard to decide which ones to let go.

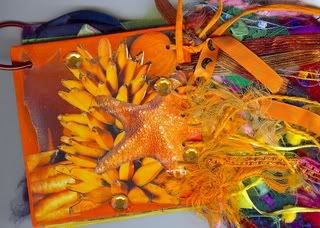
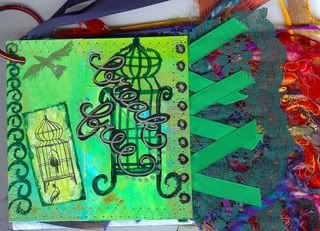
Here's the final product with my 4 pages and 1 each from the other 4 swapers. I just used my Crop-a-dile to punch a hole in the corner of the pages. One swaper had already punch a hole in the corner for her ribbon so it just kinda worked out. I used a binder ring to hold them all together. I found these at Wal-Mart. A package of 8 colored rings is ONLY 88 CENTS!! What a deal! And nice colors (red, green blue, yellowy gold). Check out ATCSFORALL.COM if you haven't yet.

On the following images I'm using the other swappers' screen names.


Photobucket

One of my pages:
Photobucket

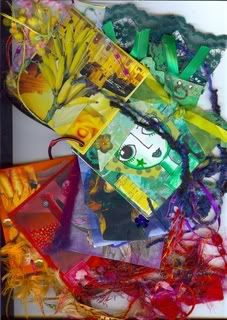
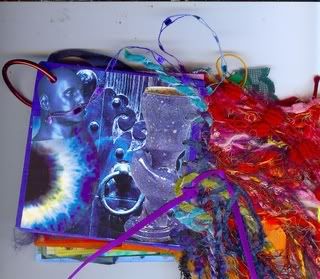
Page by jennalee from Southern CA:
Photobucket

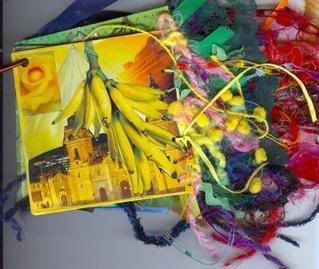
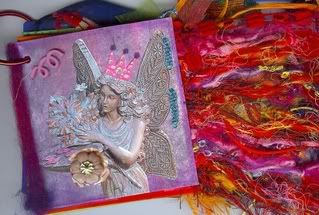
Page by KatieV from Bloominton, IN:Photobucket

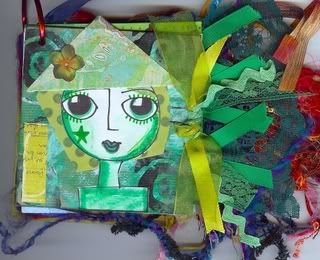
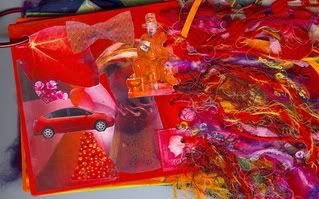
Page by Janice from Warrington in the UK:
Photobucket

Page by Me:
Photobucket

Page by Shoreart from Philadelphia, PA:
Photobucket

Page by Me:
Photobucket

Page by Me:
Photobucket

May 2-4 - COLORS ALTERED BOOK

My daughter and I had some special bonding time together over the weekend and decided to create "color" books from altered children's board books. We sanded the gloss down from the pages, layered on acrylic paints and drizzled on Pearl Ex powdered pigments (mixed with some water) then collaged and embellished with a white gel pen.

This is one of my favorite books that I've done. I think this is because I really like the way the pages turned out - similar to what I've seen in books, but have never been able to create until now. Also it is a tiny "journal" of what was going on at that time in my life and shows things I like. Just a little window of my world. (Gas is NOW $4.55 a gallon here - amazingly it has stayed at that price for more than 3 days. For awhile the price jumped 5 cents a gallon every few days. I hope this is it. I wonder if the price will ever go down???? Probably not - just like my daughter will Probably Not finish her book - I don't think she even painted all her pages - but she was a great cheerleader for my efforts.)

Photobucket

Photobucket

Photobucket

Photobucket

Photobucket


Photobucket


Photobucket

Photobucket

Photobucket

Photobucket

Photobucket

Photobucket

May 22 - BIRD HOUSE BOOK

Richele Christensen at The Stamp Art Shoppe in Roseville taught us how to make this sweet book.

We used Tim Holtz products from Ranger including crackle paint and grunge board. We also used black chipboard and the "bind-it-all" machine. This was a great project, but when I bind things I prefer my regular office-style binding machine. I like the wire spine that we used with the "bind-it-all" but the process was a little much. Many people like it so maybe it's just a matter of getting used to it?

Here are several images of the completed book:
Photobucket

Photobucket

Photobucket

Photobucket


Photobucket


Photobucket


Photobucket

Photobucket

Photobucket

May 13 - ORIENT EXPRESS

Back to The Stamp Art Shoppe in Roseville for another class! The instructor for this class is Sandy Brien, owner of Stamp Art. She is constantly creating something fabulous. In this class she taught us how to create Asian inspired cards using origami, photos, and stamps from Kodomo. What fun!


Photobucket

Photobucket

March 2nd - MASK A MASTERPIECE

This class at was taught by Karen Brooks at The Stamp Art Shoppe, Roseville, CA. This technique used a "Mask" by Heidi Swap on a piece of pre-gessoed patterned paper (something with a nice weight like Basic Grey, Signature Lie by Jen Wilson, Prima Marketing, etc.). Acrylic paints were used to layer contrasting color around the mask. Portfolio Water Soluble Oil Pastels were then used to outline the masked image to really make it "pop".

The "Masterpiece" can then be embellished as you wish: photos, stamps, ephemera, etc. I used acrylic paint and foam stamps to add the word "Home" and outlined it with a pastel gel pen. I also added a photo, some gold crowns and some fabric leaves that I'd stamped with words from a set of Bon Ton "Bon- Bons". The Bon-Bons are petite samps that are great for small projects such as ATCs or small cards - each little circular, metallic tin has many little word stamps tucked inside. I love them! As a final touch I used my chop to personalize the project. (This is the chop for my last name - a friend had it made for me on a recent trip to China. I was thrilled to receive such a wonderful gift!!)

I cut my image down to fit in an inexpensive 8" x 10" frame. I lightly sanded the frame, stained it with acrylic paint and then stamped on it. The frame doesn't show in the image below (I didn't scan it that way as I decreased the image and used it for an ATC).

Photobucket


I used some of the principles from this technique to make the following ATC. Instead of using a "Mask" though I clear embossed an image onto my paper first then layered on the acrylics. After letting the acrylics dry I placed some plain newsprint over the cards and ironed them to remove the embossing.
Photobucket

Feb 28 - ALCOHOL INKS

Richele Christensen at The Stamp Art Shoppe, Roseville, CA, is THE COLOR LADY! She's very talented and is always teaching classes on techniques for alcohol inks, distress inks, color wash, acrylic stamps daubers, etc. among her many other classes.

I've had a full set of Ranger Alcohol Inks for quite some time. I've always managed to make a nice "MUD PUDDLE" of them, wasting precious ink and Kromekot glossy cardstock. Taking this class definitely helped! (I think some of my problem was using too much blending solution and overworking the ink.)


Photobucket

Photobucket